


Waveshare 7inch HDMI LCD (H) Without Back Case1024x600 Hardware Resolution IPS Capacitive Touch Screen Supports Raspberry Pi 4B/3B+/3B./Jetson Nano/PC Windows
Original price was: $148.48.$108.89Current price is: $108.89.
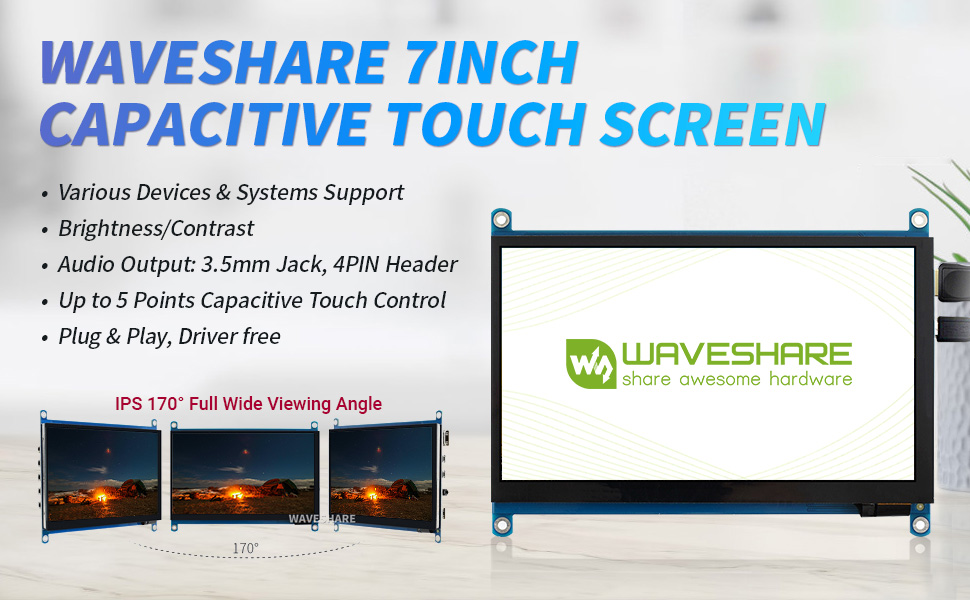
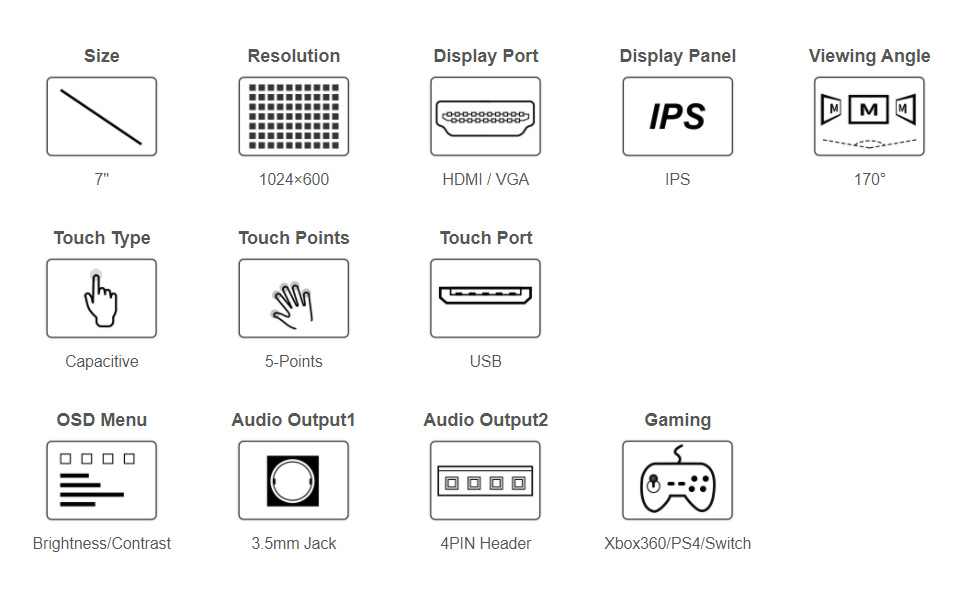
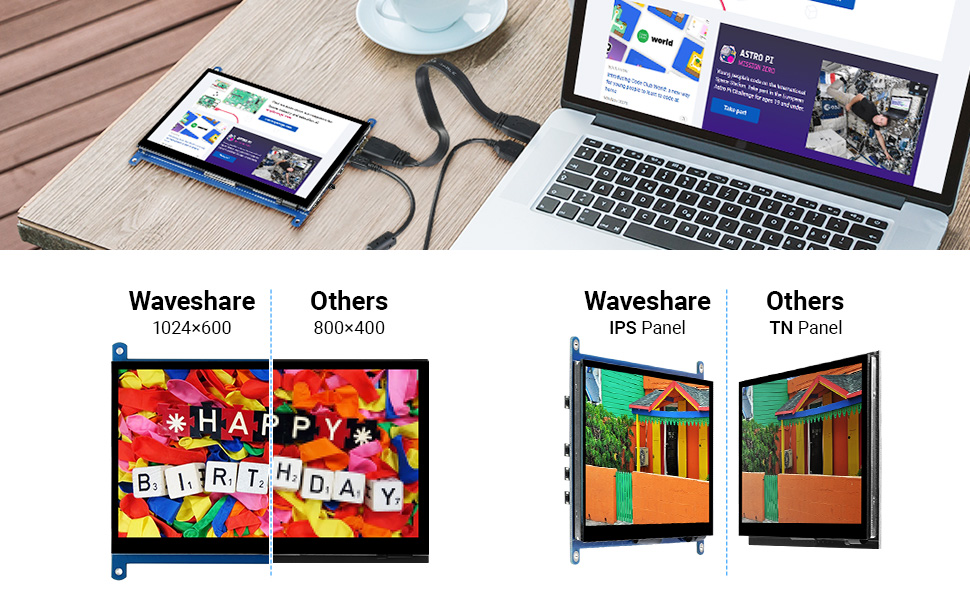
- 7inch IPS screen, 1024×600 hardware resolution, configurable by software. (up to 1920×1080)
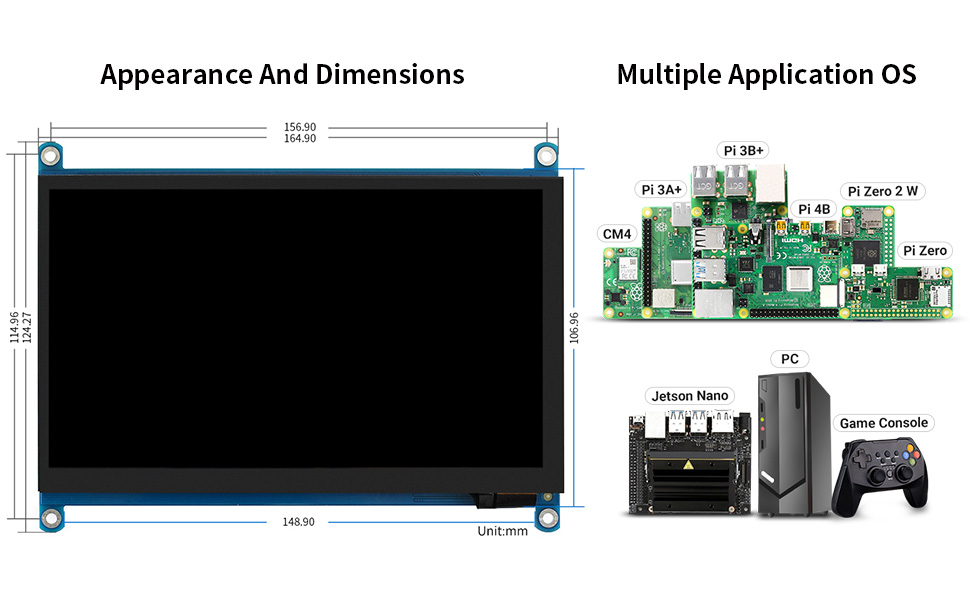
- Supports popular mini PCs such as Raspberry Pi, Jetson Nano, as well as general desktop computers; Supports popular game consoles like Xbox360, Switch…
- When used with Raspberry Pi, supports Raspberry Pi OS / Ubuntu / Kali and Retropie; When used with Windows PC, supports Windows 11 / 10 / 8.1 / 8 / 7, 5-points touch; When used with Jetson Nano, supports Ubuntu, single point touch
- Multi-languages OSD menu, for power management, brightness/contrast adjustment, etc.
- With 3.5mm audio jack, supports HDMI audio output; Also supports VGA input (specific cable is required and should be purchased separately); With PC case, optional tilt angle: 30??/50??. (case version only)
7inch Capacitive Touch Screen LCD (H) Without Back Case, 1024??600, HDMI, IPS, Various Devices & Systems Support
Features
- 7inch IPS screen, 1024×600 hardware resolution, configurable by software. (up to 1920×1080)
- Supports popular mini PC such as Raspberry Pi, BB Black, Banana Pi.
- Used with Raspberry Pi, supports Raspbian, Ubuntu, WIN 10 IoT, driver free.
- Multi-languages OSD menu, for power management, brightness/contrast adjustment, etc.
- It has a 3.5mm audio jack and supports HDMI audio output
- Supports VGA input (specific cable is required and should be purchase separately)
- High-quality PC case, optional tilt angle: 30??/50??.
Learning more: waveshare.com/wiki/7inch_HDMI_LCD_(H)?Amazon
Working with PC
This product supports Windows 10/8.1/8/7 OS.??
1. Connect the TOUCH interface of LCD to the USB interface of PC. Wait for a while, the windows will automatically recognize the touch function.
2. If you use HDMI, you need to connect the HDMI interface of LCD to the HDMI port of PC. About 5s later, you can see the LCD display properly. If you need the audio, you can insert a 3.5mm earphones to HP ports.
3. Use VGA, you need to connect the VGA interface of LCD to PC’s VGA ports by Mini HDMI to VGA Cable. Note:
- 1) When the computer is connected to several different displays at the same time, only this LCD can be used to control the cursor on the main display, so we recommended to set this LCD as the main display.
- 2) Some of PC cannot support HDMI screen Hot Plug. In this case, restart the PC can solve.
- 3) Sometimes LCD will flicker because of undersupplying from USB cable of PC. You need to connect an external power supply (5V/2A) to DC port.
- 4) HP audio output only works while using HDMI communication 5) Mini HDMI to VGA Cable is necessary and need to be purchased separately if you use VGA communication.
Working with Raspberry Pi-Supports Raspbian/Ubuntu mate/Windows 10 IoT Core
When working with Raspberry Pi, you should set the resolution of the LCD by yourself, otherwise, the LCD screen will not work. For more detailed information, please read the following section.
Please download the latest version of the image on the Raspberry Pi official website.
1) Download the compressed file to the PC, and unzip it to get the .img file.
2) Connect the TF card to the PC, use SDFormatter.exe software to format the TF card.
3) Open the Win32DiskImager.exe software, select the system image downloaded in step 1, and click??Write?? to write the system image.
4) After the image has finished writing, open the config.txt file in the root directory of the TF card, and comment out dtoverlay=vc4-fkms-V3D.
5) Add the following code at the end of config.txt, then save and quit the TF card safely.
max_usb_current=1
hdmi_force_hotplug=1
config_hdmi_boost=10
hdmi_group=2
hdmi_mode=87
hdmi_cvt 1024 600 60 6 0 0 0
If you use the LCD with Raspberry Pi 4B, you need to remove line dtoverlay=vc4-fkms-V3D from config.txt file
You must make sure that there are no spaces on either side of the equal sign.
Working with Jetson Nano
To work with Jetson Nano Developer Kit, you don??t need to make software configuration.
1) Connect the TOUCH interface of the LCD to the USB interface of Jetson Nano.
2) Connect the HDMI interface of the LCD to the HDMI interface of the Jetson Nano and then power on the Jetson Nano. After about 5 seconds, you can see the LCD display normally. If you need to output sound, you can insert a 3.5mm earphones to the HP audio output interface.
Note:
1) If the LCD flickers, it may be due to insufficient power supply of the Jetson Nano’s USB interface. It can be solved normally after connecting to an external 5V/2A power supply through the DC interface of the LCD.
2) When the HP audio interface is in use, it may be necessary to set the sound output settings in the system.
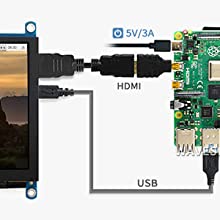
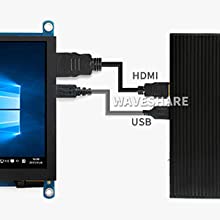
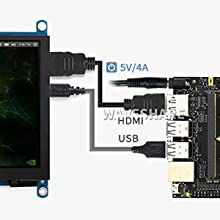
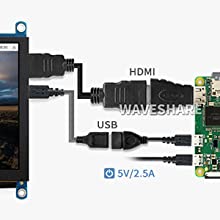
Connection Examples
|
|
|
|
|
|---|---|---|---|
Working With Raspberry PiSupports Raspbian, 5-points touch, driver free Supports Ubuntu / Kali / WIN10 IoT, single point touch, driver free Supports Retropie, driver free |
Working With Mini PCSupports Windows 11 / 10 / 8.1 / 8 / 7, 5-points touch, driver free |
Working With AI Computer Jetson NanoSupports Ubuntu, single point touch, driver free |
Working With Raspberry Pi Zero WYou need to prepare additional mini HDMI adapter and USD cable |
Appearance
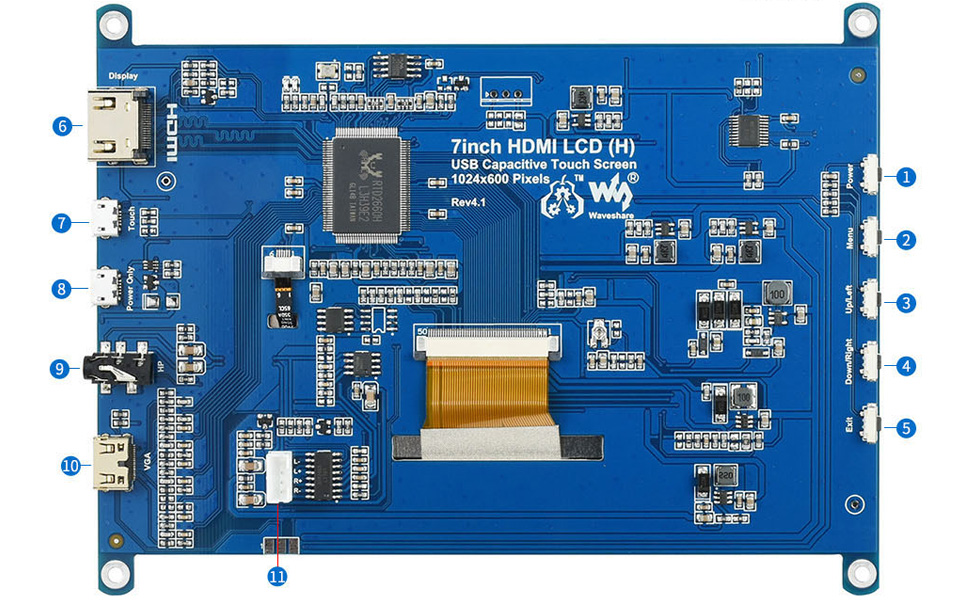
- Power Button
- Menu Button
- Up/Down Button
- Left/ Right Button
- Return/ Exit Button
- HDMI Port
- Touch Port
- Power Input
- Earphone Jack
- VGA Display Port( mini HDMI connector)
- Speaker Header
Demystifying Design Details
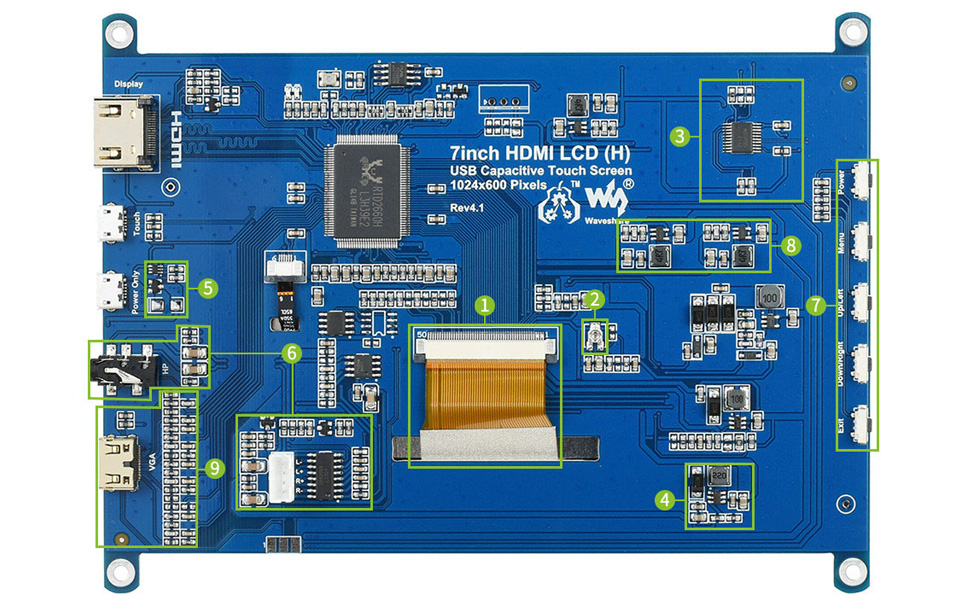
- LCD FFC cable anti-interference design, more stable for industrial application
- VCOM voltage adjustment for optimizing display effect
- USB protocol translator, converting the touch signal into standard multi-points touch protocol to achieve smooth multi-points touch control
- 4~5.5V wide range USB power input, to avoid display flickering or touch failure that caused by low USB voltage
- One-way isolation circuit. When powered from Touch port, the 5V voltage from Touch port will provide power supply for both touch function and display circuit. When powered from Power Only port, the Touch port will provide power supply for just touch function, and the other circuit will be powered via Power Only port. The two power inputs are totally isolated to prevent any breakdown
- Two audio outputs for earphone and speaker, each track of speaker supports 2.6W PA circuit
- OSD menu config buttons for adjusting backlight and display color
- DC-DC LCD driver circuit, low heating on long term operation
- VGA port to support VGA devices
You must be logged in to post a review.
Related products
-
Gigabyte Radeon RX 6600 XT Gaming OC 8GB Graphics Card
Original price was: $470.58.$345.09Current price is: $345.09.Add to cart- Powered by AMD RDNA 2 Radeon RX 6600 XT
- Integrated with 8GB GDDR6 128-bit memory interface
- WINDFORCE 3X Cooling System with alternate spinning fans
- Screen cooling
- Graphene nano lubricant
-
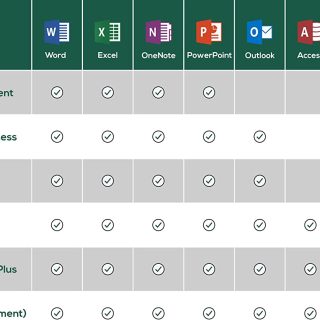
Office Professional 2019 for Windows 10 & 11 (Lifetime Version)
Original price was: $65.98.$48.39Current price is: $48.39.Add to cart- Includes Word, Excel, PowerPoint, Outlook, Access, Publisher, OneNote
-
Dell Inspiron 14 2-in-1 (5410) – Windows 11 Home, 14″ Touch FHD (1920 x 1080) Intel 11th Generation Core i7-1195G7, 16GB DDR4 RAM, 512GB SSD, Intel Iris Xe Graphics – Platinum Silver (Latest Model)
Original price was: $2,931.03.$2,149.42Current price is: $2,149.42.Add to cart- 14.0-inch FHD (1920 x 1080) Truelife Touch Narrow Border WVA Display
- 11th Generation Intel Core i7-1195G7 Processor (12MB Cache, up to 5.0 GHz)
- 16GB, 2x8GB, DDR4, 3200MHz , 512GB M.2 PCIe NVMe Solid State Drive
- Intel Iris Xe Graphics with shared graphics memory
- Intel Wi-Fi 6 2×2 (Gig+) and Bluetooth 5.1
- Included components: documents
-
Belkin 4 Port USB-C Travel Hub,Black,F4U090btBLK
Original price was: $72.00.$52.80Current price is: $52.80.Add to cart- The Belkin difference: Pioneer in innovation and technology for over 35 years
- Designed for MacBook Pro 2016/17, Chromebook Pixel and other USB-C compatible laptops
- Connect multiple devices through the hub to your laptop, including a hard drive, mouse, keyboard, printer and more
- Equipped with (2) USB-A ports, (2) USB-C ports and a tethered, foldaway USB-C cable
Reviews
There are no reviews yet.